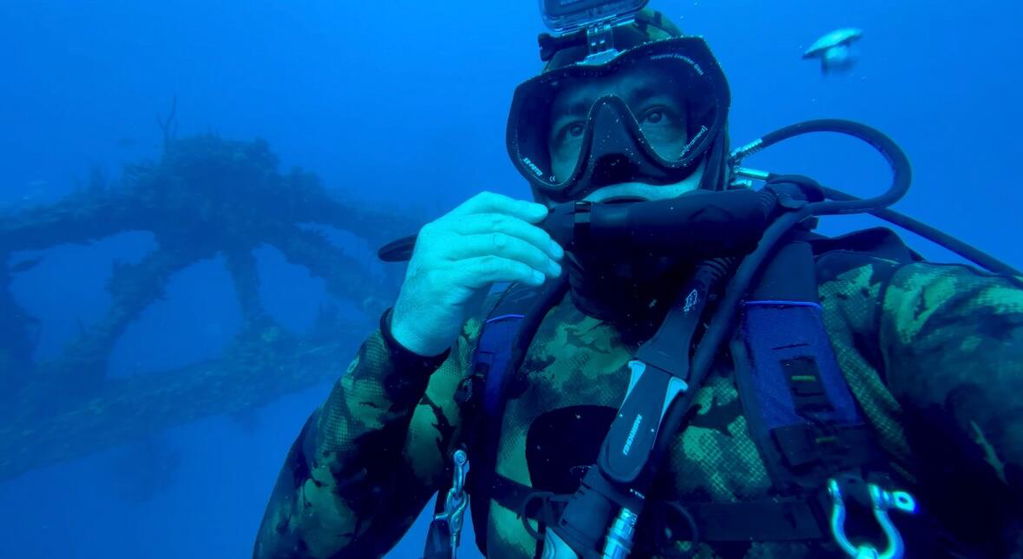
You surfaced from a reef dive convinced you'd nailed the shot. The coral was orange, the fish were yellow, the whole scene glowed. Then you opened the files on your laptop and everything is blue-grey mush.
This is the single most common frustration in underwater photography, and it has nothing to do with your camera being cheap. It's physics. Once you understand what water does to light, the fix becomes straightforward — and most of it costs nothing.
Why water turns your photos blue
Water absorbs light selectively. Long wavelengths — the reds, oranges and yellows — carry less energy and get absorbed first. Short wavelengths, the blues and violets, travel much further before they're absorbed.
According to NOAA's Ocean Exploration program, the approximate depths at which each color drops out are:
- Red — gone by roughly 5 m (15 ft)
- Orange — gone by roughly 10 m (33 ft)
- Yellow — gone by roughly 20 m (66 ft)
- Green — gone by roughly 30 m (100 ft)
- Blue — travels deepest, and is the last to fade at around 60 m (200 ft)
At 18 m (60 ft) on ambient light alone, there is essentially no red left in the water for your sensor to record. A red sea fan doesn't photograph as dull red — it photographs as grey-blue, because the red light needed to make it look red never reached it.
Distance matters as much as depth
Here's the part divers often miss: the water between your lens and your subject counts too. If you're at 10 m but shooting a turtle 4 m away, the light reaching your sensor has traveled 14 m of water. Horizontal distance filters color exactly the same way vertical depth does.
That single fact drives the most effective fix on this list.
Fix 1: Get closer — much closer than feels natural
Reducing the water column between lens and subject is free, works at any depth, and improves sharpness and contrast at the same time. As a working rule, keep your subject within about 1 m (3 ft) of the lens, and closer still if you can manage it without disturbing marine life.
This is why wide-angle lenses dominate underwater photography. A wide lens lets you fill the frame with a large subject from 30 cm away instead of 3 m — same composition, a tenth of the water in between.
If you're shooting with a phone housing or compact camera, a wet wide-angle lens is usually the highest-value upgrade you can make before buying anything else. Browse what's available in lenses and filters.
Fix 2: Set a manual white balance
Auto white balance is calibrated for surface light. Underwater it sees an overwhelmingly blue scene and often makes it worse, not better.
Most cameras — including phone housings with manual controls — let you set a custom white balance by pointing at a neutral reference. The routine:
- Descend to your working depth.
- Point the camera at a white or grey slate, a sandy patch, or the palm of your glove.
- Trigger the custom white balance function.
- Reset it every time you change depth by more than a few meters.
Manual white balance recovers a surprising amount of warmth down to roughly 15–20 m (50–65 ft). Below that there simply isn't enough red light left to rebalance, and the camera starts producing muddy, magenta-tinted results. That's the point where you need to add light or a filter.
Fix 3: Use a red filter — but only in the right conditions

A red (or magenta, for green water) filter sits over the lens and cuts blue light so the remaining warm tones are proportionally stronger. Used correctly it produces excellent ambient-light color. Used incorrectly it ruins the shot.
When a red filter works
- Roughly 5–25 m (15–80 ft) — the band where some red still exists to be rebalanced
- Bright, sunny conditions with good ambient light
- Wide-angle scenes: reefs, wrecks, schooling fish, divers
- Video, where you can't fire a strobe on every frame
When a red filter fails
- Any time you're using a strobe or video light. The filter cuts the blue out of your artificial light too, so the lit area turns bright red. Filters and artificial light are alternatives, not partners — pick one.
- Below about 25 m, where there's no red left to recover
- Low light, dusk, overcast days, or green temperate water without the correct magenta filter
Filters also cost you roughly one to two stops of light, which means slower shutter speeds and more motion blur. On a bright tropical reef that's fine. On a kelp dive it usually isn't.
Phone shooters can get filter and wide-angle optics together — the DiveVolk SeaTouch 4 Max Plus Ocean Kit bundles a red correction filter and a wide-angle lens with the required adapter, and it pairs with the SeaTouch 4 MAX PLUS housing, one of our best-selling smartphone dive housings.
Fix 4: Bring your own light

Every other fix on this list is damage control. Artificial light is the only method that actually puts red back into the scene, and it's the reason professional underwater images look nothing like what your eye sees at 25 m.
Video lights or strobes?
Video lights are continuous. You see exactly what you're lighting, they work for stills and video, and they double as a dive light. They're the simpler choice for most divers and the right choice if you shoot video at all.
Strobes fire a brief, powerful burst. They freeze motion, deliver far more light per shot, and let you use small apertures for deep focus — but they're stills-only and take practice to aim. If you're moving toward serious wide-angle stills, look at underwater strobes.
What to look for in a video light
- Beam angle: 100–120° for wide-angle scenes. Narrow spot beams create harsh hotspots.
- Color rendering (CRI): 90+ produces noticeably more accurate reds and skin tones.
- Output: 2,000–3,000 lumens handles most recreational macro and mid-range work. 5,000+ is for wide scenes and open water.
- Burn time: check runtime at full power, not the marketing figure at minimum power.
The SeaLife Sea Dragon 2300F COB Photo-Video Light Kit is a sensible starting point — a wide, even COB beam with a tray and grip included, so you're not buying mounting hardware separately. If you want higher output and stronger red rendering, the Sea Dragon 3000F Color Boost kit steps up meaningfully. The full range lives in underwater video lights.
Position the light correctly or you'll create backscatter
Mounting a light directly above the lens is the fastest way to photograph every suspended particle between you and your subject. Instead:
- Push lights out wide on arms, away from the lens axis
- Angle them so the edge of the beam — not the hot center — falls on the subject
- Pull them back slightly behind the port so the beam doesn't illuminate the water column directly in front of the lens
Flexible arms and trays make this adjustable rather than fixed; see camera trays, arms and connectors.
Fix 5: Shoot RAW and finish in editing
If your camera or phone supports RAW, use it. A RAW file keeps far more color data than a JPEG, which means white balance becomes a slider you move after the dive rather than a decision you're locked into underwater.
Realistic expectations matter here. Editing amplifies color information that exists in the file; it cannot invent red that was never recorded. A well-exposed RAW shot at 12 m can be corrected beautifully. A JPEG shot at 30 m with no artificial light cannot be rescued, no matter how far you push the temperature slider.
Basic workflow: correct white balance first, then adjust exposure and contrast, then lift shadows, then add saturation last — not first.
Which fix should you use?
- Snorkeling or shallow diving, 0–10 m: get close and set a manual white balance. That's usually enough.
- Bright reef diving, 10–25 m, wide-angle or video: red filter plus manual white balance, no artificial light.
- Any depth, macro or close subjects: video light or strobe, no filter.
- Below 25 m, or in low visibility, or in cold green water: artificial light. There is no ambient-light workaround.
- Night diving: artificial light only.
Common mistakes worth avoiding
- Running a red filter with a video light. The most frequent error we see. Choose one approach per dive, or fit a filter you can remove underwater.
- Setting white balance once at the start of the dive. Color temperature changes continuously with depth. Reset it as you descend.
- Shooting downward. Downward angles put the seafloor behind your subject and add water column. Get low and shoot slightly upward — you gain contrast against open water and a more natural perspective.
- Cranking saturation to compensate. Oversaturating a blue image produces a blue image with louder blue. Fix the white balance first.
- Ignoring condensation. A fogged port ruins contrast and color before light ever reaches the sensor. A moisture absorber packet in the housing is cheap insurance.
Frequently asked questions
Why do my GoPro photos look so blue?
Action cameras have small sensors, fixed wide lenses and aggressive auto white balance, which makes the blue cast especially obvious. Set white balance manually if your model allows it, add a red filter for shallow ambient-light shooting, and get much closer to your subjects.
Do I need a red filter if I have a video light?
No — and you shouldn't use both. The filter will strip blue from your light output and turn the lit area red. If you own a light, leave the filter off.
What's the best white balance setting for underwater?
A custom or manual white balance set against a neutral reference at your working depth. Preset "underwater" modes are a rough approximation that can't account for your specific depth, water color and time of day.
How deep can I still get good color without a light?
In clear, bright tropical water, roughly 15–25 m (50–80 ft) with a filter and correct white balance. Beyond that, ambient light no longer contains enough red to recover, and artificial light becomes necessary.
The short version
Blue photos aren't a camera problem, they're a water problem. Shorten the water column by getting closer, set white balance manually and often, use a filter in the shallow-to-mid range on bright days, and add artificial light once you're deep or shooting close-up subjects. Apply even two of those on your next dive and the difference will be obvious on the drive home.
Ready to upgrade your setup? Start with underwater cameras and video lights at DiveCatalog.